Automated Motion Testing
System identification and response recording made easy.
The MotionServer is a specialized component designed for robot calibration and system identification. It performs two critical tasks:
Automated Testing: It sends open-loop reference commands (e.g., steps, circles) to the robot.
Data Recording: It records the robot’s actual response (Odometry) versus the sent command (
cmd_vel) to a CSV file.
This data is essential for tuning controllers, verifying kinematic constraints, or training machine learning models.
The Recipe
Below is a complete recipe to launch a simulation (or real robot), triggering the Motion Server via an event.
Create a file named motion_test.py:
import numpy as np
import os
from ament_index_python.packages import get_package_share_directory

# Kompass Imports
from kompass.robot import (
    AngularCtrlLimits, LinearCtrlLimits, RobotGeometry, RobotType, RobotConfig, RobotFrames
)
from kompass.components import (
    DriveManager, DriveManagerConfig, MapServer, MapServerConfig,
    TopicsKeys, MotionServer, MotionServerConfig
)
from kompass.ros import Topic, Launcher

def run_motion_test():
    kompass_sim_dir = get_package_share_directory(package_name="kompass_sim")

    # 1. Robot Configuration
    # Define physical limits (Crucial for the MotionServer to generate valid test commands)
    my_robot = RobotConfig(
        model_type=RobotType.DIFFERENTIAL_DRIVE,
        geometry_type=RobotGeometry.Type.CYLINDER,
        geometry_params=np.array([0.1, 0.3]),
        ctrl_vx_limits=LinearCtrlLimits(max_vel=0.4, max_acc=1.5, max_decel=2.5),
        ctrl_omega_limits=AngularCtrlLimits(max_vel=0.4, max_acc=2.0, max_decel=2.0, max_steer=np.pi / 3),
    )

    # 2. Configure Motion Server
    # We configure it to run "Circle Tests" for 10 seconds per test
    motion_config = MotionServerConfig(
        test_period=10.0,
        run_circle_test=True,
        run_step_test=False,
        tests_folder=os.path.expanduser("~/.kompass/tests") # Where to save CSVs
    )

    motion_server = MotionServer(component_name="motion_server", config=motion_config)
    motion_server.run_type = "Event" # Wait for a trigger to start

    # 3. Drive Manager
    # Acts as the safety layer between MotionServer and the Hardware
    driver = DriveManager(
        component_name="drive_manager",
        config=DriveManagerConfig(critical_zone_distance=0.05)
    )

    # Handle ROS 2 Distribution message types
    cmd_msg_type = "TwistStamped" if os.environ.get("ROS_DISTRO") in ["rolling", "jazzy"] else "Twist"

    # 4. Wiring
    # The Driver publishes the final hardware command
    cmd_topic = Topic(name="/cmd_vel", msg_type=cmd_msg_type)
    driver.outputs(robot_command=cmd_topic)

    # The MotionServer listens to that SAME topic to record what was actually sent
    motion_server.inputs(command=cmd_topic)

    # 5. Context (Map Server)
    map_server = MapServer(
        component_name="global_map_server",
        config=MapServerConfig(
            map_file_path=os.path.join(kompass_sim_dir, "maps", "turtlebot3_webots.yaml"),
            grid_resolution=0.5
        )
    )

    # 6. Launch
    launcher = Launcher()
    launcher.kompass(components=[map_server, driver, motion_server], multiprocessing=True)

    # Link Odometry (The response we want to record)
    odom_topic = Topic(name="/odometry/filtered", msg_type="Odometry")
    launcher.inputs(location=odom_topic)

    launcher.robot = my_robot
    launcher.frames = RobotFrames(world="map", odom="map", scan="LDS-01")

    # 7. Enable UI
    # We expose the RUN_TESTS input so we can trigger it from the browser
    launcher.enable_ui(
        inputs=[motion_server.get_in_topic(TopicsKeys.RUN_TESTS)],
        outputs=[map_server.get_out_topic(TopicsKeys.GLOBAL_MAP), odom_topic]
    )

    launcher.bringup()

if __name__ == "__main__":
    run_motion_test()
How to Run the Test
1. Launch the Stack
Run the script you just created. Ensure your simulator (e.g., Webots or Gazebo) is running first.
python3 motion_test.py
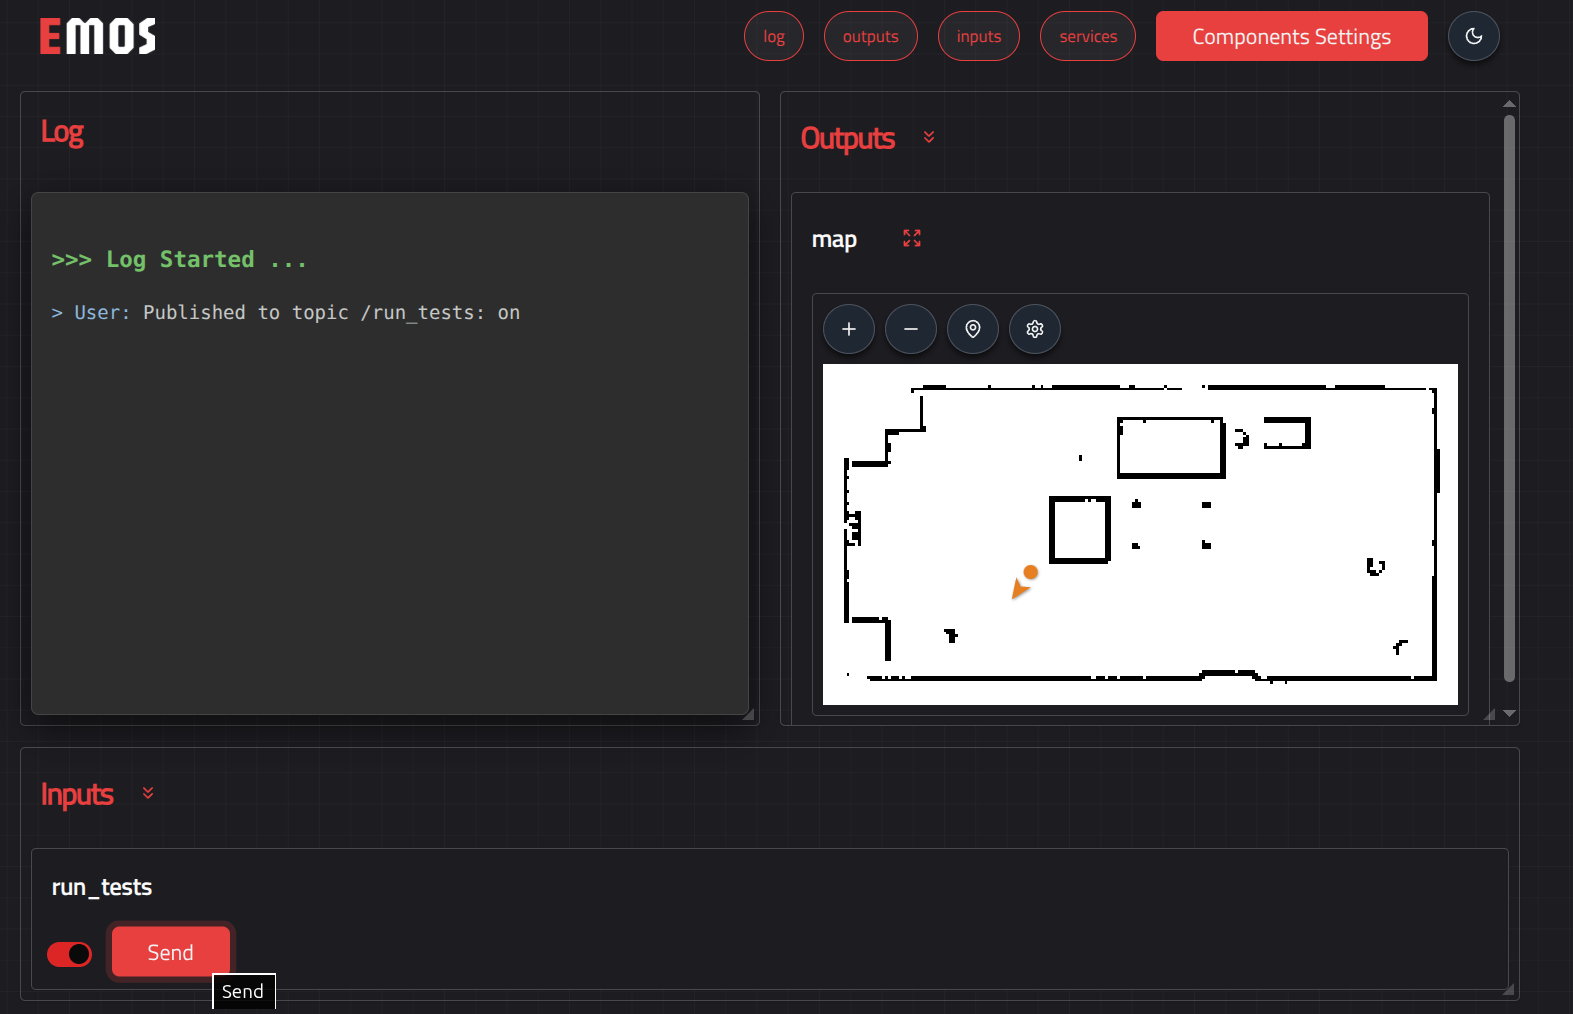
2. Open the UI
Open your browser to the local UI URL (e.g., http://0.0.0.0:5001). You will see the map and the robot.
3. Trigger the Test
In the Inputs panel on the UI, you will see a switch or button for run_tests.
Toggle it to True and click send.
4. Watch the Robot
The robot will immediately execute the configured test pattern (e.g., driving in circles).
Forward Circle: Max Velocity / 2
Inverse Circle: Negative Velocity
Backward Circle
The robot will automatically stop after the sequence is complete.
Analyzing the Data
Once the tests are finished, check the folder configured in tests_folder (in the recipe above: ~/.kompass/tests).
You will find CSV files named by the test type (e.g., circle_forward.csv).
CSV Structure:
timestamp |
x |
y |
yaw |
cmd_vx |
cmd_vy |
cmd_omega |
|---|---|---|---|---|---|---|
16234.12 |
0.0 |
0.0 |
0.0 |
0.2 |
0.0 |
0.2 |
… |
… |
… |
… |
… |
… |
… |
You can plot these columns to compare the cmd_vx (Reference) vs the derivative of x (Response) to calculate your system’s step response and latency.
Configuration Options
You can customize the testing behavior via MotionServerConfig:
test_period(float, default=10.0): Duration of each individual test step in seconds.run_step_test(bool, default=False): Runs linear step inputs (forward/backward straight lines).run_circle_test(bool, default=True): Runs combined linear and angular velocity commands.tests_folder(str): Absolute path where CSV files will be saved.
Wiring Tip
The MotionServer generates commands, but usually sends them to the DriveManager first for safety checks. However, for accurate recording, the MotionServer should listen to the output of the DriveManager (cmd_vel) as its input. This ensures you record exactly what was sent to the motors, including any safety overrides.